
I’d recommend going through Part 1 of the implementation first. It covers how you can quickly setup a Floating Action Button. Though if you feel you’ve already got that covered, feel free to proceed.
In this part, I’ll show you how we can add some neat animations to our Floating Action Button (FAB) such as the initial grow animation, as well as a Quick Return pattern (famously seen on the Google+ app).
Floating Action Button Animations
As per the design guidelines, the FAB must:
- hide upon scrolling down and reappear when scrolled up (known as the Quick Return Pattern)
- initially greet users with a ‘grow’ animation upon entering app screen
The quick return pattern can most commonly be found in the current Google+ app. Screen real estate is important especially on smaller devices. Upon scrolling, the toolbar and FAB translate to being hidden. This allows you to view the main scrollable content, distraction-free. When you scroll up, both views translate back up.
For a better idea on what it is, watch it in action below:
Quick Return
Custom ScrollListener
So first off, let’s create the Quick Return pattern. It’s better to sort and organize your project from the very beginning, so create a new package utils under your main package com.yourname.app.
Now under the utils package, create a new abstract class MyRecyclerScroll. This is going to extend RecyclerView.OnScrollListener. Now its pretty obvious what extends class will do (judging from the name). Yep, you’re right, listen to scroll events!
Now the OnScrollListener provides us with 2 handy methods that we can use, such as the onScrolled() and the onScrollStateChanged() method.
However, the method that we’re interested in is the onScrolled(). So go ahead and implement that method.
public abstract class MyRecyclerScroll extends RecyclerView.OnScrollListener {

    @Override
    public void onScrolled(RecyclerView recyclerView, int dx, int dy) {
        super.onScrolled(recyclerView, dx, dy);
        ...
    }
}
Now why we made it an abstract class is because, we’re going to create a custom scroll listener for our recycler view that detects the direction of scroll. Depending on that, we’ll hide or show our FAB. We’ll then hook it up to the fab in our MainActivity.java and implement its methods to handle them.
The Approach
So before we dive into the all the messy code, let’s analyse how the Quick Return Pattern works.
- When the user scrolls down, the FAB animates downward and gets hidden.
- The FAB remains hidden while the user scrolls down.
- If the FAB is not visible and user scrolls up, the FAB animates up and becomes visible.
- FAB continues to remain visible while the user scrolls up.
With that said, in order to achieve this we need to track just two things:
- The distance & direction of scroll
- Whether the FAB is visible
Let’s start off by declaring those 2 variables that we need.
int scrollDist = 0;
boolean isVisible = true;
Initialy scroll distance will obviously be zero, hence its set to that. By default upon entrance the FAB will be visible and so the boolean is set to true.
onScrolled Method
Now in the onScrolled() method, if we take a look at the last 2 parameters: int dx, int dy. These are the horizontal and vertical scrolls respectively.
We’re only concerned with dy, which gives us a positive value on scrolling down, and negative value scrolling up. We need to record the scroll distance first, then do appropriate checks whether the FAB is visible and accordingly show or hide it.
Also, in order to check if the scroll distance will suffice, add a new variable static final float MINIMUM = 25. This is the value against which we’ll check our scroll distance. Unless the scroll distance not going to be greater than that, we won’t bother to hide or show the FAB. It helps avoid weird stuttering with the FAB, when we scroll slightly in either direction.
@Override
    public void onScrolled(RecyclerView recyclerView, int dx, int dy) {
        super.onScrolled(recyclerView, dx, dy);

        if (isVisible && scrollDist > MINIMUM) {
            hide();
            scrollDist = 0;
            isVisible = false;
        }
        else if (!isVisible && scrollDist < -MINIMUM) {
            show();
            scrollDist = 0;
            isVisible = true;
        }

        if ((isVisible && dy > 0) || (!isVisible && dy < 0)) {
            scrollDist += dy;
        }

    }
Algorithm
Nothing scary up there. We’re just handling 2 if conditions; hide FAB if visible when scrolling down, and show FAB if not visible when scrolling up.
- We’re first checking if FAB is visible and if the scroll(down) is above the minimum.
- If that’s true then, hide FAB. Since it’s not visible anymore, set its boolean and also reset scroll distance.
- We only need to record scroll distance upto which the FAB hides/ shows. Need not bother recording the ENTIRE scroll distance.
- Similarly, if the FAB is hidden, we’ll call the show() method.
- We’re checking scroll distance against -MINIMUM because remember I said dy gives a negative value on scrolling up. Hence we must compare it against negativ MINIMUM.
- Finally, the two OR conditions are whether the user scrolls up or down, we’ll just count the scroll distance.
Below this method, add 2 abstract methods.
public abstract void show();
public abstract void hide();
We’ll be using these methods in our MainActivity to handle our FAB.
Attaching to the Activity
Our custom ScrollListener is now complete. All we need to do is attach it to our MainActivity and implement its abstract methods show() & hide().
...
recyclerView.setOnScrollListener(new MyRecyclerScroll() {
           @Override
           public void show() {
               fab.animate().translationY(0).setInterpolator(new DecelerateInterpolator(2)).start();
           }

           @Override
           public void hide() {
               fab.animate().translationY(fab.getHeight() + fabMargin).setInterpolator(new AccelerateInterpolator(2)).start();
           }
       });
...
We’re simply attaching our custom ScrollListener ‘MyRecyclerScroll’ as the ScrollListener for our RecyclerView. Upon doing so, we implement the 2 abstract methods.
For the show method, we handle the show animation for the FAB. The translationY distance is 0 because we want the FAB to come back to its original position. For hide method, we obviously hide the FAB. It’s translation distance will be the FAB height (56dp) + its margin (16dp). This is the distance the FAB is required to move off screen.
You could play around with different Interpolators and their timings no issues, but I’ve found these to work just fine for me.
Now go ahead and run your app. You can see our FAB animate quite nicely.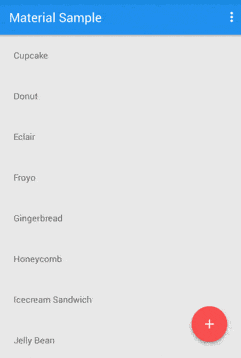
Grow Animation
Next, we’ll implement a grow animation for our Floating Action Button.
The floating action button animates onto the screen as an expanding piece of material, by default. The icon within it may be animated. – source
This one’s relatively easy to implement. All that we’re going to do is create an XML scaling animation that grows our FAB from 0 to its original dimensions. We will then reference that animation in our Activity and attach it to our FAB.
The XML
Start by creating a new folder called anim under your res folder. Create a new XML file for a scale animation and name it simple_grow.xml.
So our path should be like res/anim/simple_grow.xml.
<scale xmlns:android="http://schemas.android.com/apk/res/android"
    android:fromXScale="0.0"
    android:fromYScale="0.0"
    android:toXScale="1.0"
    android:toYScale="1.0"
    android:duration="700"
    android:pivotX="50%"
    android:pivotY="50%"
    android:interpolator="@android:anim/accelerate_decelerate_interpolator">

</scale>
The X & Y to and from scale parameters are essential. We tell the animation that we need to start from 0 scale, which is no dimensions ( so you cant see it) and then scale the X & Y to 1.0 (maximum scale) so that we can see the FAB. 700 is a nice duration for the animation (which I’ve fixed at after a lot of trial). We need to give the animation some time to run and for the user to admire it.The pivot X & Y say that we want to scale it from the center. Without defining these two, the animation will scale from the top left by default. Lastly, we set a Decelerate Interpolator so that it looks nice. It lets the scale ease the animation towards the end.
If you’re interested in knowing more about Interpolators, you can give this a read, or watch it live below. Have fun experimenting with different Interpolators to achieve different effects!
Add animation to the FAB
Open the MainActivity.xml and define the animation before we set our content view using Animation animation = AnimationUtils.loadAnimation(this, R.anim.simple_grow); Then after we’ve referenced our fab from the XML, we simply set the animation to the FAB with fab.startAnimation(animation);
 protected void onCreate(Bundle savedInstanceState) {
        super.onCreate(savedInstanceState);

        Animation animation = AnimationUtils.loadAnimation(this, R.anim.simple_grow);
        ...
        fab = (FloatingActionButton) findViewById(R.id.fab);
        fab.startAnimation(animation);

}
Whatever you’ve got running in your onCreate() method, make sure you start the FAB animation at the end. Making it start too early would cause to animation to skip by the time the user gets to see. So make it run towards the end of your onCreate().
Watch the video below to see how it finally looks like.
With this, we’re done. Cheers! We’ve got a nice little growing animation that greets the user upon entering the app, and then the FAB translates nicely when the user scrolls up and down the list.
Download the project or head over to my GitHub repo to check out the animation code sample.