As a developer turned designer, I have always been fascinated with ways to close the gap between design and development. Recently, I stumbled upon Framer X. After using it for quite a while, I’m convinced that it is a powerful new design tool that closes that gap considerably and encourages tighter collaboration.
NOTE
This is not a sponsored post. I haven’t been paid by Framer to write this. All opinions are purely based on my personal experiences with the tool. Moreover, this isn’t a hate post for other design tools (each one excels in its own right).
Design tools of the past
I have been an avid Sketch user for over 6 years now. However, for prototyping, I always found Framer JS more suited. Yes, the old Framer Classic that scared almost every designer (including me) which required writing code.
Now, at the time, for logic-based complex prototyping, this was the tool for the job. Framer JS used CoffeeScript, a preprocessor that was friendly and simpler to write so I braved and jumped right in.
However, despite that, it was so time-consuming to build something in Framer JS that it was my last resort for prototyping. It still didn’t replace my daily design tool yet.
Sometime later, along came Principle. A simple, timeline-based interaction design tool. Given its ease of use, I had quickly forgotten Framer.
Fast forward to 2019 and I didn’t see Framer JS around anymore. Instead, it was Framer X and everything about it seemed different.
What is Framer X?
Framer X is a smart interaction design tool for realistic prototypes.
Framer X is a complete overhaul with a low entry barrier for designers. Unlike previous versions, I could do everything I could I Sketch (and perhaps more!) without writing a single line of code. Designing and prototyping weren’t two different modes. I found myself seamlessly doing both together. Moreover, there was a slew of features unheard of that highly piqued my curiosity. I had to use it myself to see what the hype was about.
If you are a designer who can code or a coder that can design, Framer X will be your very best friend.
Game-Changing Framer X Features
In this article, I’ll show you a comparison between common tasks I’d do in Sketch which, trust me, is similar in almost every other major tool (yes, Figma and XD) and how Framer X handles the same. Hopefully, towards the end of this article, you’re as excited as I am to jump into this new hybrid tool.
So without further delay, here are some of the reasons why I switched to Framer X.
Responsive Design For Real
To clarify, responsive design in practice (as a designer) is the ability to create and set up on elements on canvas to resize in specific ways across different screen sizes.
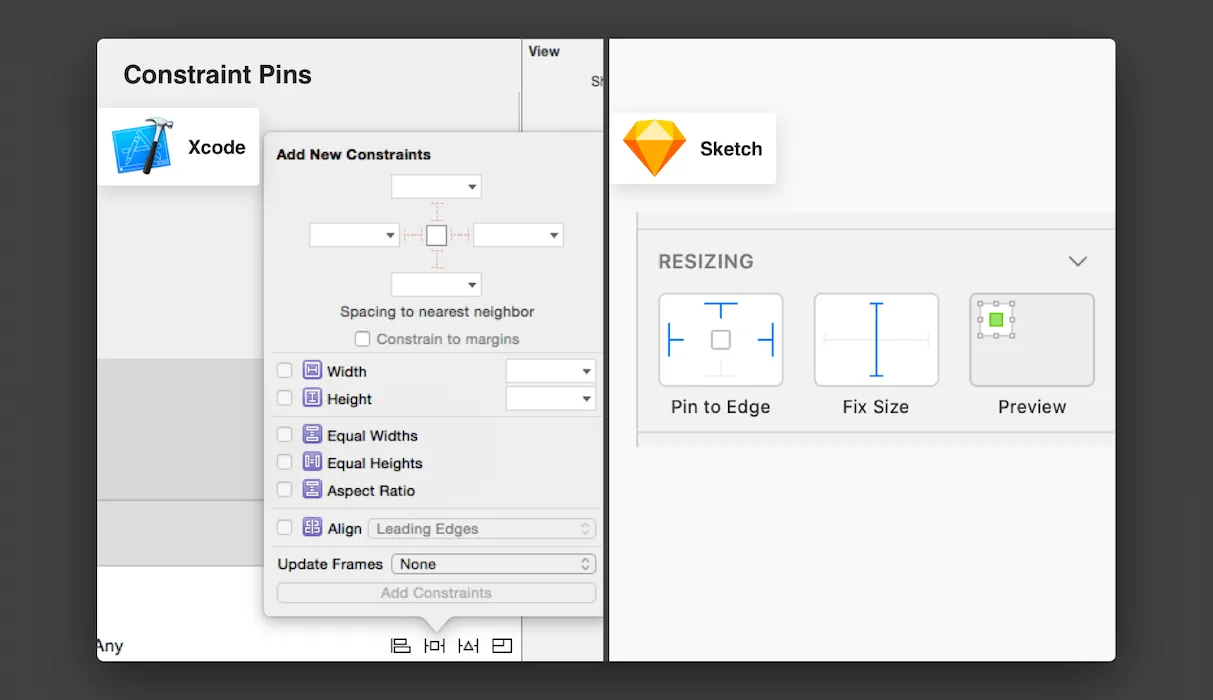
Sketch mimics a simplified version of Xcode’s AutoLayout. This feature (of using constraint pins) is familiar across other tools too.
However, I find some quirks with this in Sketch.
For any element to be resizable, I need to MANUALLY setup every constraint! Moreover, oftentimes, I care about setting constraint values over the specific width or height of an element. For example, if I’m designing a list on iOS. I don’t care about the width of the list itself. What’s more important is that the list maintains a 20px (safe area guides) margins on either side. For that, I’ll have to recalculate the list’s width itself to get 20px margins on either side.
Now, Sketch experts might argue that I could use dummy rectangles, rulers or the Anima plugin to space without pixel calculation. That’s workable, but not efficient.
Here’s how Framer X does Responsive Design
One word — “automatic”.
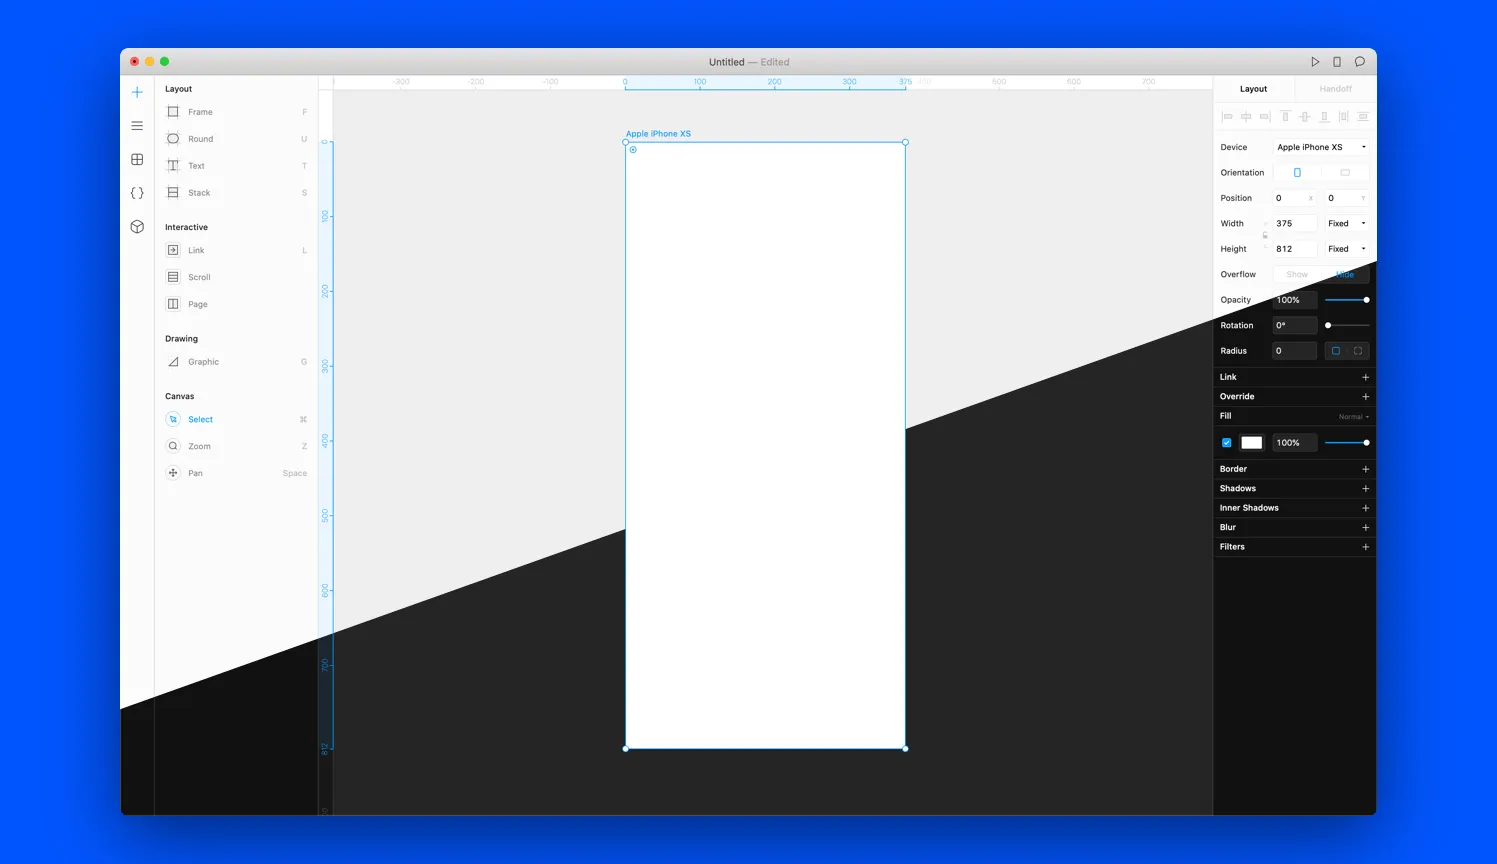
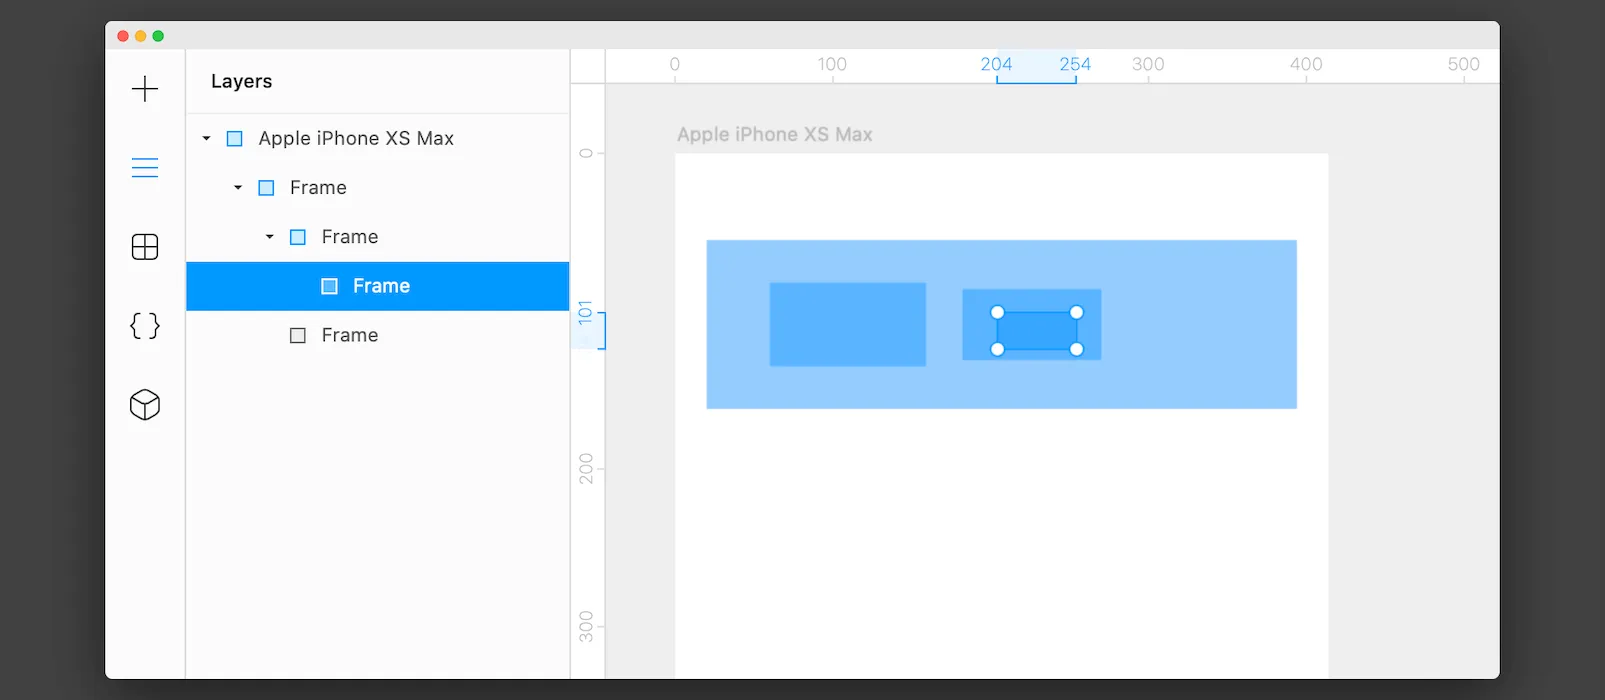
Based on how elements are positioned in your Artboard or “Frame” (no, it’s not a pun), Framer will automatically set up constraint pins. In other words, your mocks are responsive by default!
Notice how I didn’t explicitly set any width for that rectangle. No manual math. Just set constraint values, Framer automatically pins them based on its position.
The automatic constraint pins are a HUGE time-saver, allowing me to design with speed.
If you look at how responsive design in front-end development, setting specific constraint values over specific element values is the norm. For example, when setting a fluid grid, you would declare the margins around each grid item, but let the screen width dictate the size of the grid item itself. Framer uses a similar approach that feels more familiar to use and powerful.
Frames over layers
I was confused with the concept of Frames vs Layers first. Traditionally, layers represent individual elements in our Artboards. You could also group them. But groups weren’t layers themselves. This was my understanding with Sketch (no quarrels here). It was a nice way to organize and understand how to build mocks.
Things in Framer are different. While the Layers panel exists, each “layer” in Framer is actually a Frame (no pun intended). Figma folks may feel right at home here.
Each Frame is an empty container that can house other Frames or elements. You can drag and drop other elements inside this Frame. Doing so makes that Frame the automatic parent of those elements. In fact, your “Artboard” is also a Frame.
This is similar to div tags in HTML. Each <div/> can nest child elements. Furthermore, this parent div container’s properties can affect it’s children as well.
READ
CSS-Tricks clearly explains the CSS Box Model and how that applies to (web) design.
Initially, this skewed my mental model of how ‘layers’ worked and I struggled. However, over time, this felt natural and more flexible.
I couldn’t figure out how to best explain why in words. So I made a video for you instead. In this video, I design a simple card in Sketch and then the same in Framer.
Workflow differences in Sketch and Framer
Previously, I had to draw dummy, invisible rectangles to act as (fake) containers for my elements and then group them. This definitely was NOT ideal! Framer allows you to use Frames as containers for your elements which considerably reduces layer complexity.
Stacks
Stacks are what Flexbox is in web-development (CSS).
In Framer, Stacks are good for expressing truly fluid layouts. It can automate things such as distribution and alignment.
Learn more about Stacks from Framer
In Sketch, this functionality doesn’t 100% exist, or in any other tool for that matter. I can somewhat mimic the same with Sketch’s Smart Layout or the Anima plugin, but it isn’t truly “fluid”.
However, the Stacks feature in Framer is much more powerful. You start by drawing a Stack and then throw elements inside it. Later, you can configure the Stack’s properties such as orientation, how items should be distributed, and spacing between individual items.
This feature opens up powerful possibilities for responsive layouts such as navigation bars, drawers, lists, and grids to name a few. All of these become very easy to make and closer to the real thing.
Prototyping in Framer X
Traditionally, I always found myself in two distinct modes:
- Design - where I design all the mocks and its variants (states) for prototyping flow
- Prototype - I take a pass at all my mocks and add in hotspots and links
In Framer, I am designing and prototyping in parallel. The experience here feels very seamless. You can build a click-through prototype in Framer without writing any code.
For things like drawers, modals, and more, I don’t find myself redesigning (or copy-pasting) screens. I only design those elements I need for the transition.
LEARN MORE: Simple click-through prototyping in Framer X
Logic via code
Framer X allows you can take literally ANY element on the canvas and introduce behavior. Remember I mentioned that Framer X is React powered. Be it simple animations, complex interactions, or logic, it is possible.
Every Framer project is a Web project.
However, I’ll admit this involved me having to learn basic React. Luckily, Framer X uses TypeScript, which made writing JSX syntax MUCH easier.
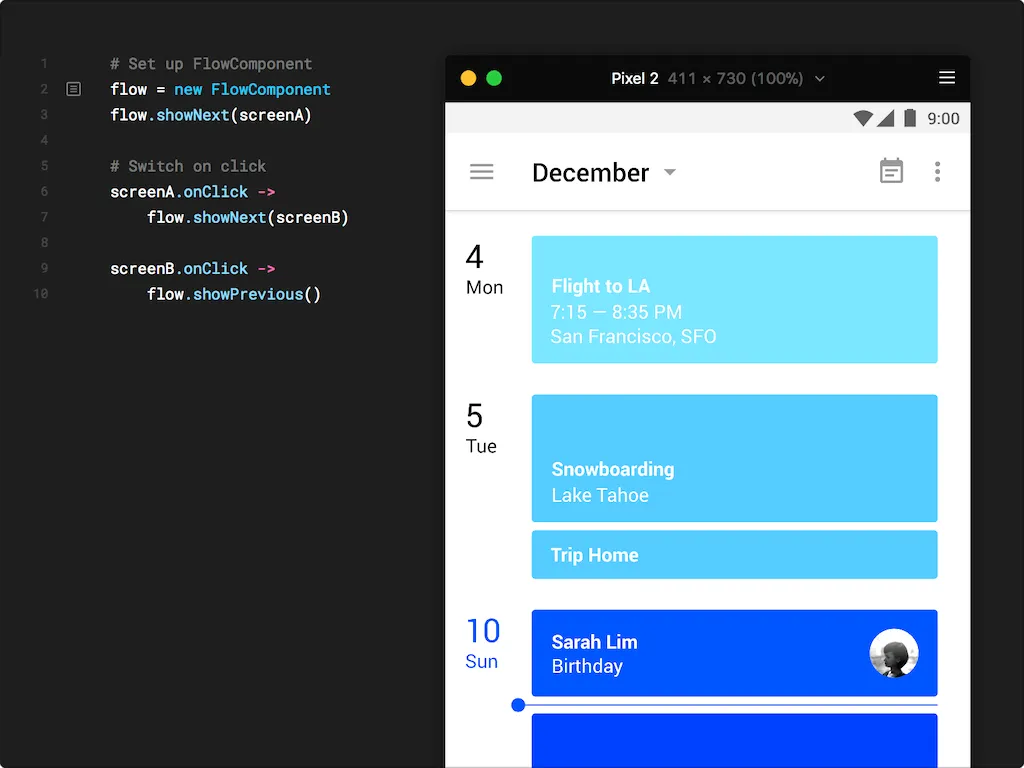
If I want to do things like show a button click? No problem. Show an alert on button click? Sure!
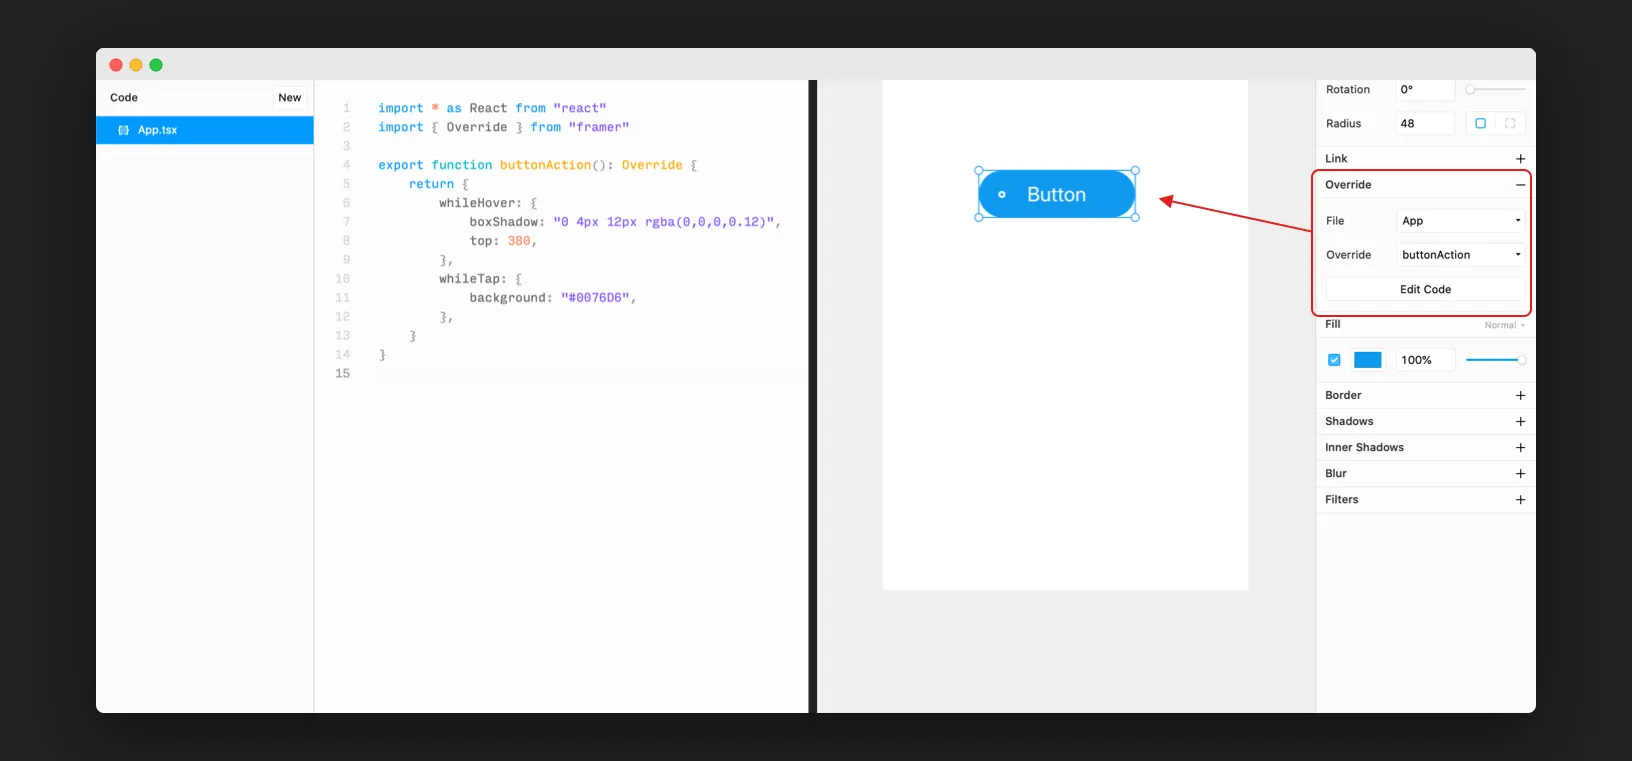
Here’s a quick example of how I’d write some code to animate a button on hover and click. I simply have to write a function and then tell my button on canvas to use it.
This example barely scratches the surface. You can do complex scroll interactions, logic-based prototypes, pulling data via APIs, using real front-end components, and more. But I’m going to keep it simple for now. If you’re interested, the Framer 101 Crash Course is the best place to start.
Designing for the future
It’s been well over a couple of months since I’ve started using Framer X. While it feels different from tools we’re typically used to, I found Framer more dynamic and powerful. Framer’s tools allow me to communicate my work with high levels of fidelity that wasn’t possible before.
While those are great benefits, to avoid a biased opinion, it’s important to document its downsides.
Framer X Disadvantages
- Framer’s tools, while more intuitive have an initial learning curve
- To take full advantage of Framer, you’ll have to touch code (and learn React)
- You can achieve extremely high fidelity with Framer - clearly define how much detail is needed in advance
To end on a more positive note, and to recap, here’s why Framer became my main, go-to design tool.
Framer X Advantages
- Automatic Responsive Design
- Frames and Stacks are powerful tools for responsive design
- Prototyping feels natural and can be used interchangeably when designing (over being a different “mode”)
- Intuitive prototyping without having to duplicate Artboards for UI changes/states
- Use real, interactive components in design
- Framer projects are web projects (you can literally Inspect Element your UI)
- Ability to add logic with code
Not ready to switch yet?
No problem! Framer X allows you to copy-paste your design elements directly from Sketch/Figma. I did this for a good while until I was confident to fully switch.
READ
How to start using Sketch and Framer X — smashingmagazine.com
An Exciting Future Ahead
Framer X is an interesting and hybrid tool that sits at the intersection of design and development. If you are an engineer who can design or a designer who can code, I highly recommend giving Framer a try. Moreover, Framer is coming to the web this year, which has me excited about all the ways we could improve collaboration.
UPDATE
Framer Web is out and now includes a Free plan
What are your thoughts on the new Framer? Have you tried it already?