SQLite database is one way to store your app’s data locally in Android. In this Android SQLite Database tutorial, I’m here to show you an easier way to it. Using Sugar ORM.
Insanely easy way to work with Android Databases. - Sugar ORM
Here are other storage options you could check out. Typically using SQLite in Android required a lot of boilerplate code, which took considerable time. But with Sugar ORM, all you need is a model (bean) class and you’re good to go. Taking the example of a note app similar to Google Keep, we’ll see how to:
- Add a new note (save)
- Delete note
- Modify
Setting up Sugar ORM
- Add this under your build.gradle dependencies block:
compile 'com.github.satyan:sugar:1.4'- Modify your AndroidManifest.xml as follows:
…
Designing Entities
A model (bean) class which extends SugarRecord is all you need. Sugar ORM will use the information in this class to automatically create a table. Awesome right? Since ours is a note app, the entity will simple be Note.
public class Note extends SugarRecord {

String title, note;
    long time;
    // Default constructor is important!
    public Note() {
    }

public Note(String title, String note, long time) {
        this.title = title;
        this.note = note;
        this.time = time;
    }
 …
// Getter setters here
}
The UI
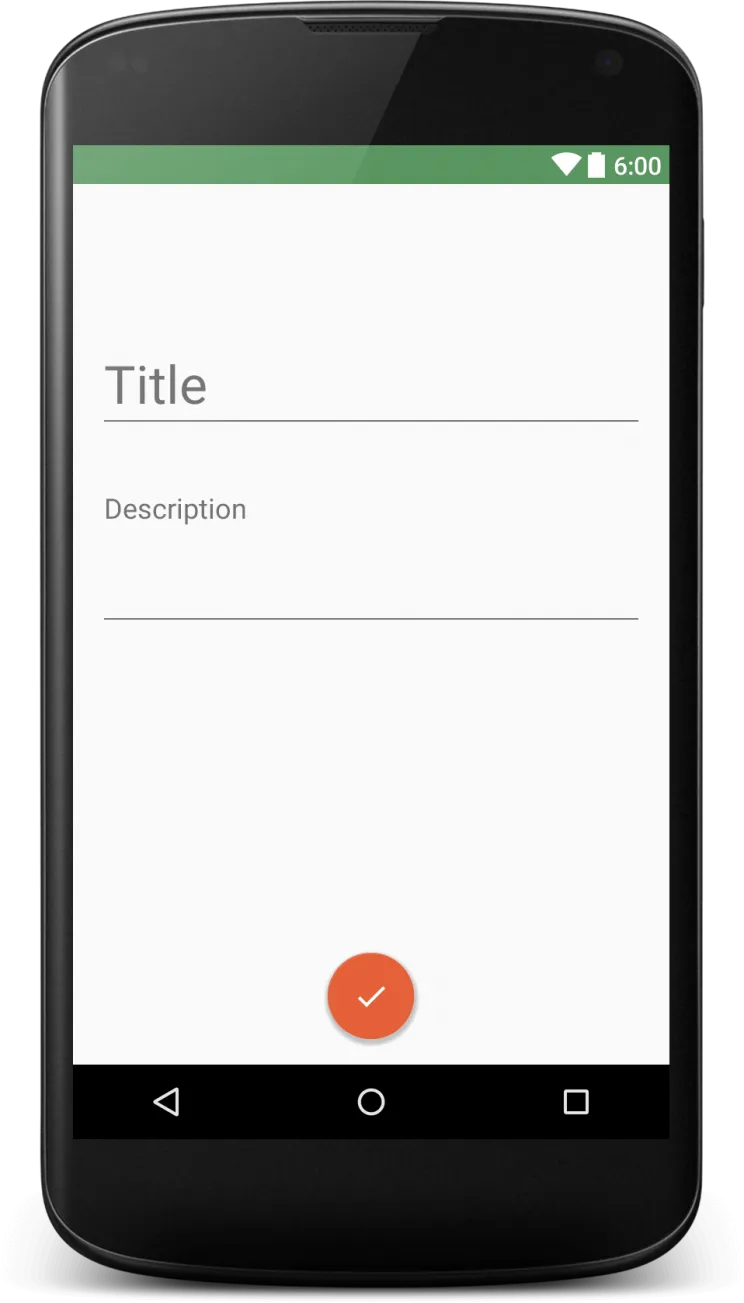
For the scope of this tutorial, I will simple show you how my UI will look like. Let’s concentrate on how Sugar ORM works instead. There are just 2 screens:
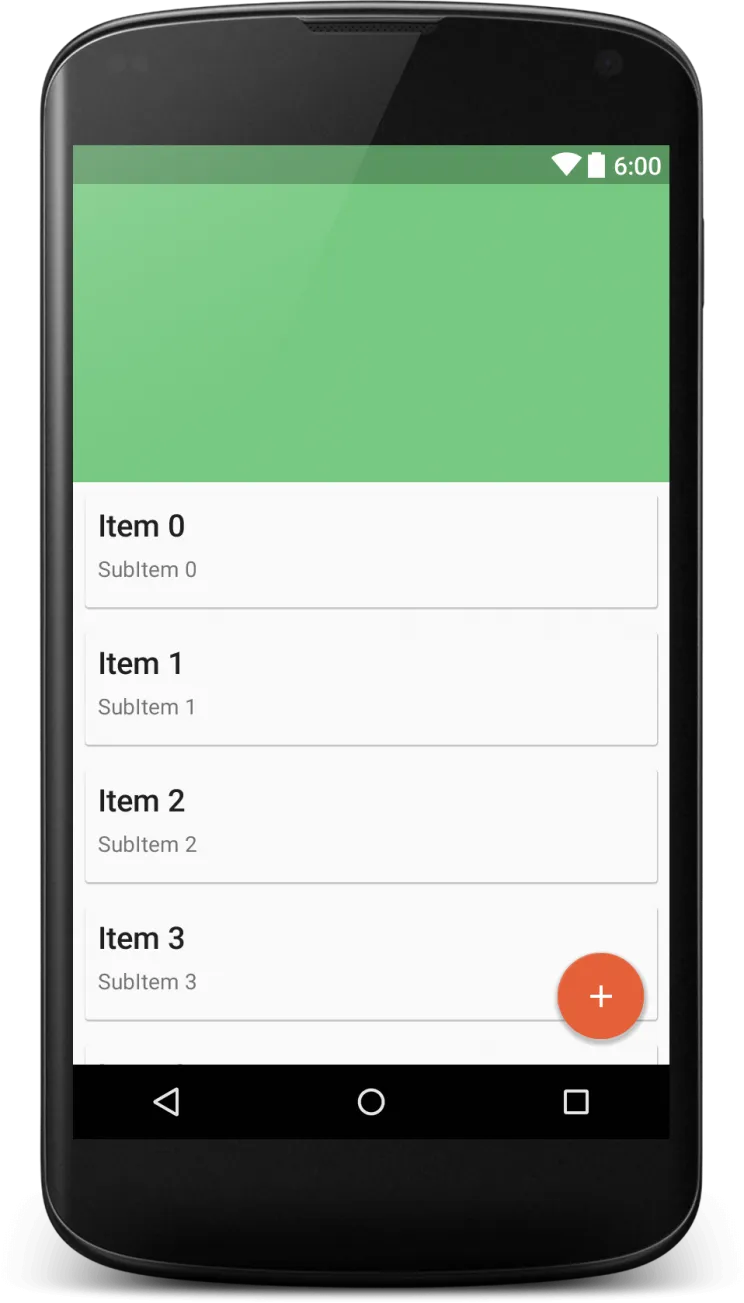
Nothing complex here. Those are simple list detail views. I made quick work of it with the Design Support Library. If you’re unfamiliar with that, then these tutorials can help. READ ALSO:
- Toolbar Animation (Flexible Space with Image Pattern)
- Material Design Tabs with Design Support Library
- Easy Navigation Drawer
I setup a StaggeredGridLayout for my RecyclerView, akin to Google Keep.
StaggeredGridLayoutManager gridLayoutManager =
        new StaggeredGridLayoutManager(2, StaggeredGridLayoutManager.VERTICAL);
gridLayoutManager.setGapStrategy(StaggeredGridLayoutManager.GAP_HANDLING_MOVE_ITEMS_BETWEEN_SPANS);
recyclerView.setLayoutManager(gridLayoutManager);
Now let’s move on to how we can easily perform basic database functions.
CRUD made easy with Sugar ORM
Create
Note note = new Note(title, desc, time);
note.save();
Update
Note note = Note.findById(Note.class, id);
note.title = “updated title here";
note.save();
Delete
Note note = Note.findById(Note.class, id);
note.delete();
Listing all notes
List notes = Note.listAll(Note.class);Let’s take a small breather here. Were we able to do CRUD operations, in just one line each? That’s amazing!
Queries
What is SQL if you can’t use queries? Sugar has got you covered there too! There are 2 ways to do this. Let’s take an example to compare the two.
Raw Query
List notes = Note.findWithQuery(Note.class, "Select * from Note where name = ?", "mynote");Query Builder
Select.from(Note.class)
.where(Condition.prop("title").eq("mynote"),
Condition.prop("description").eq("notedesc"))
.list();
From this point on, I highly encourage you to build a simple notes app on your own. Use this post and the link to Sugar’s docs for reference. However, if you think you need help, don’t worry, read on below.
Sugar ORM in our Notes app
Now that we have the basics done, let’s see how Sugar ORM can help us make a simple Notes app. With most of the boilerplate code out of the way, this should be a snap. We’ve already seen how to add a note above. We do this in the AddNoteActivity.java class. Pretty simple.
Updating Notes
We can use the same Activity to update the existing note. We do this by passing an Intent from MainActivity.java. Here’s the snippet:
List notes = Note.find(Note.class, "title = ?", title);
                 if (notes.size() > 0) {

                     Note note = notes.get(0);
                     note.title = newTitle;
                     note.note = newDesc;
                     note.time = newTime;

                     note.save();
                 }
              finish();
First fetch the Note from the database. I’m finding it based on the title, but ideally you’d do it using an ID of sorts. I simply update that note object with my new data and save, successfully updating it.
Making RecyclerView play nice with Sugar
Everything ultimately boils down to how your RecyclerView can display and update the notes. Make it play nice with the changes you do. Let’s see how we can update our RecyclerView depending on changes such as deleting, adding and modifying a note. We initially display all notes saved via Sugar simply like this in your onCreate():
 notes = Note.listAll(Note.class);

adapter = new NotesAdapter(MainActivity.this, notes);
recyclerView.setAdapter(adapter);
Update RecylerView after creating a note
We return to MainActivit****y using finish(), after creating a new note in AddNoteActivity. So what get’s triggered upon return? onResume(). So this is where we refresh our RecyclerView.
final long newCount = Note.count(Note.class);

    if (newCount > initialCount) {
        // A note is added

        // Just load the last added note (new)
        Note note = Note.last(Note.class);
        notes.add(note);
        adapter.notifyItemInserted((int) newCount);

        initialCount = newCount;
    }
Since the newly created note would be the last item added, we simply fetch that and notify our adapter of the same.
Deleting a note
I’m using Swipe to Dismiss to achieve this. Here’s the logic:
final int position = viewHolder.getAdapterPosition();
               final Note note = notes.get(viewHolder.getAdapterPosition());
               notes.remove(viewHolder.getAdapterPosition());
               adapter.notifyItemRemoved(position);

               note.delete();
               initialCount -= 1;

               Snackbar.make(recyclerView, "Note deleted", Snackbar.LENGTH_SHORT)
                       .setAction("UNDO", new View.OnClickListener() {
                           @Override
                           public void onClick(View v) {

                               note.save();
                               notes.add(position, note);
                               adapter.notifyItemInserted(position);
                               initialCount += 1;

                           }
                       })
                       .show();
Observe that we take care of notifying our adapter here too, after an item is deleted via a swipe to dismiss. READ ALSO: Swipe to Dismiss for RecyclerView with ItemTouchHelper
Output
Now let’s see Sugar work its magic. Watch on YouTube As you can see, Sugar ORM for Android really took away a lot of boilerplate code needed to start using SQLite in our apps. We took an example of a Note app as our use case, and this Android SQLite Database tutorial showed us how easy we can use databases thanks to Sugar ORM. As always, here’s the source code link: GitHub What did you make with Sugar ORM? Drop ‘em in the comments below, or subscribe for more tutorials like this!