People API Android Tutorial – Part 1

Imagine having access to your contacts including data about them and their connections, via a single API? Combine the Contacts API and Google+ API and we have the People API.
You can read the announcement on Google Developers Blog.
Never was a fan of the Contacts API in Android, so I’m glad this came into picture. In this two-part post, we’ll look at using the People API.
The People API lets you list authenticated users’ Contacts and retrieve profile information for authenticated users and their contacts.
Part 1 of this post covers how to create a project via Google API Console. Then we’ll see how to configure it, enable the People API and make it ready for access via our Android app.
If you feel you’re already familiar with all this, jump ahead to part 2 of the People API Android Tutorial. Part 2 is where all this is put into action in code. However, I suggest you at least skim through this.
Two Different People API
Let’s clear some misconceptions first.
First, there’s the Google+ People API. Those who have used Google+ library in Android, would be familiar.
Now that is not the same as this, which is what I’m talking about. Not the Google+ version.
The difference in simple words is:
[su_row][su_column size=”1/2″]
People API (new)
- Denotes your Google contacts
- Your Contacts and Google+ data through one API.
[/su_column][su_column size=”1/2″]
Google+ People API
- Denotes Google+ users
- Only Google+ related data
[/su_column][/su_row]
You can refer the links above, just in case I haven’t convinced you enough.
Ok, I’m saying API too much. Let’s get started?
Create a new project
Head over to https://console.developers.google.com and create a new project.
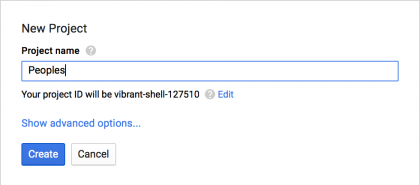
Next, enable the People API.
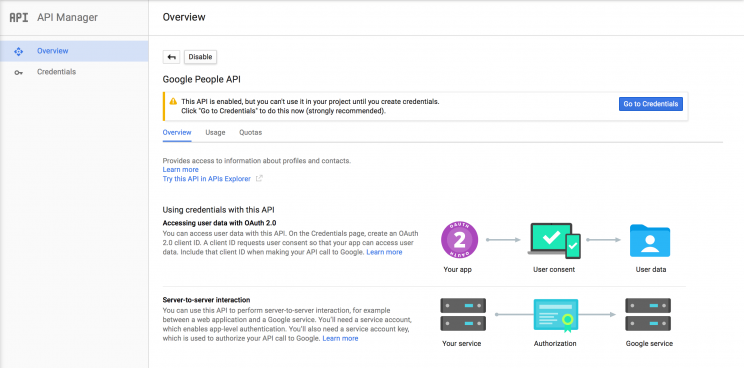
Once you enable the People API, you’d see that little warning about credentials. It authenticates our app to make API calls. So let’s do that next.
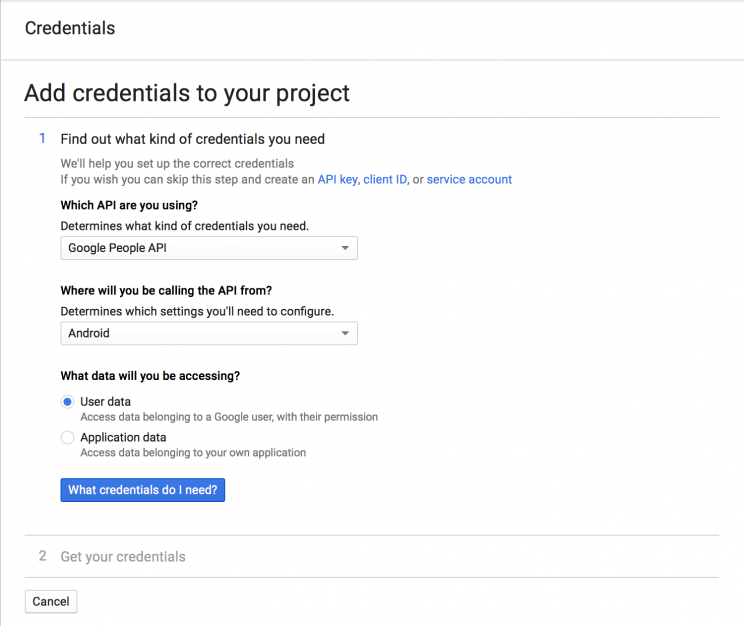
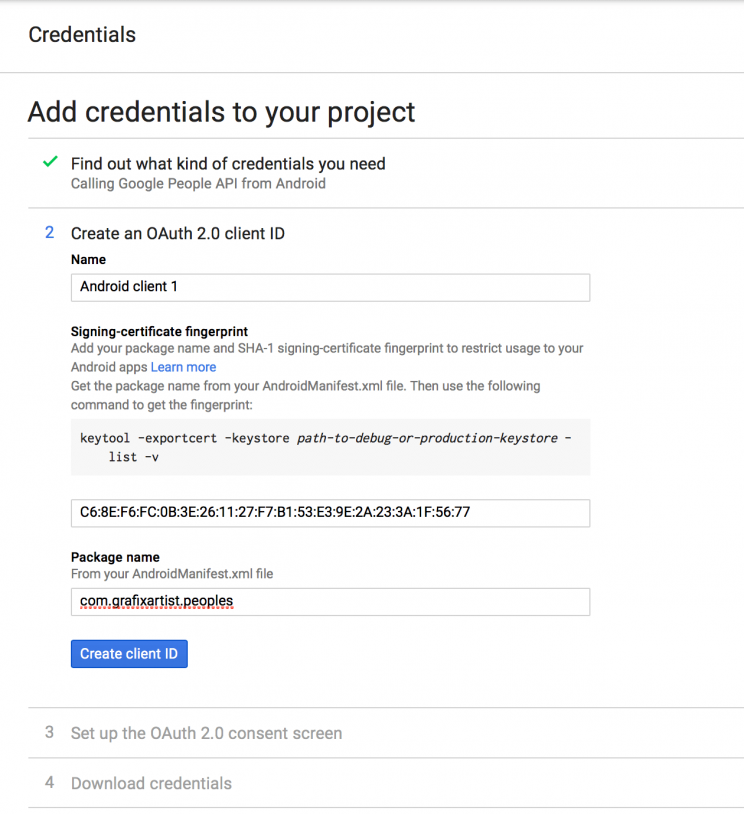
Adding Credentials
[su_row][su_column size=”1/2″]
[/su_column] [su_column size=”1/2″]
[/su_column] [/su_row]
Use Android’s debug certificate for signing. Here’s the command:
keytool -exportcert -alias androiddebugkey -keystore $HOME/.android/debug.keystore -list -v
$HOME/.android/debug.keystore is the default path on Mac. For windows, the debug.keystore can be found in your Android SDK folder.
Successfully executing this will print your SHA-1 fingerprint key. You need it for generating credentials for an Android client. After configuring your credentials you will be prompted to download them as a JSON file. You don’t have to download it.
[su_row][su_column size=”1/2″]

Client ID for Web
[/su_column] [su_column size=”1/2″]
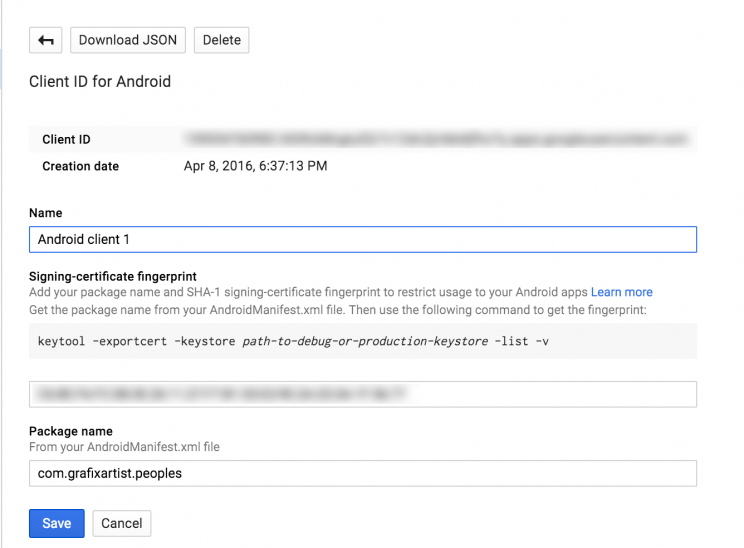
Client ID for Android
[/su_column] [/su_row]
It’s important that credentials are created for Android, and OAuth Client ID for web. Once you’ve created credentials for Android, do the same for web. You’ll need your web’s Client ID and Client Secret in the future.
It might appear strange to add credentials for a Web client, for an Android app. It appears that we need credentials for BOTH Web and Android clients for it to work. However, within our Android app we’ll only use keys from the Web client. Sound’s weird right? Well that’s how it works. Really hope Google would simply this in the future.
So this is how my Credentials section in the API Manager is looking right now:

If yours looks similar to this, then you’re good to go. You can name both your clients anything you want. I’ve stuck to the default names.
Enable Play Services for Android
To successfully link the People API and Play Services on our Android device, we’ll be using Google Sign-in. Doing so, allows us to authenticate our requests which the API requires.
Start by enabling Play Services for your newly created project.
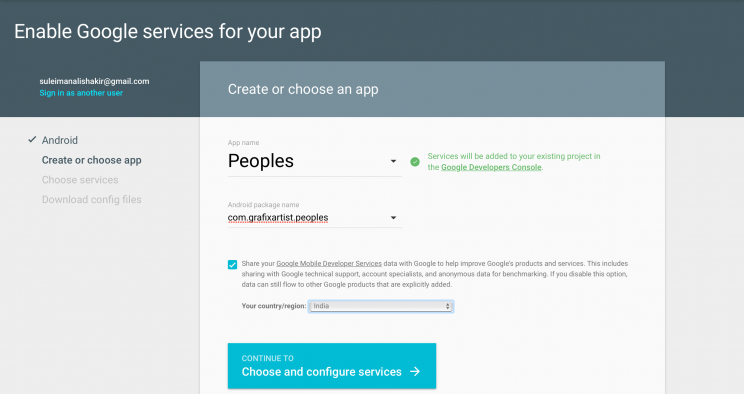
Hit that huge blue button to proceed. In the next step, enable Google Sign-In. Remember that SHA-1 fingerprint we got in the previous step? Add that same key here.
Finally, generate your configuration file, google-services.json and download it. It includes all the credential details you generated in the previous step. Neat!
Let’s take a breather here.
Why did we do all this? I just want to use the People API. Is all this needed? If you’re asking anything like these questions, here’s the long story short. Using any of Google’s API services requires authentication (OAuth). It basically involves an exchange of a token which validates against the requests you make.
The Play Services are specific to Android OS. They have a super easy API client library to use. This is possible with the Play Services SDK installed by default on your Android device. Some of the Google APIs come along with Play Services, such as Google+, Analytics and Maps.
Here’s the list of APIs bundled with Play Services. All the other Google APIs can be found here.
What we’re doing is, using Play Services to Sign-in. Then obtain a token from here and access a Google API (People API). We’re going to integrate the two.
Here’s how both the mechanisms work:
[su_row][su_column size=”1/2″]

[/su_column][su_column size=”1/2″]

[/su_column][/su_row]
I hope that was clear enough for you. A more detailed explanation of integrating the two, can be found in the Android developer’s blog post. You can ignore the code snippets there. It’ll be covered in Part 2 of this post.
Great! Now we have a ready project created in Google API Console. We’ve created credentials for both Android and Web clients, and enabled Play Services with Google Sign-in.
With all the needed configuration in place, we’re ready to integrate this into our Android app.
Head over to part 2!


