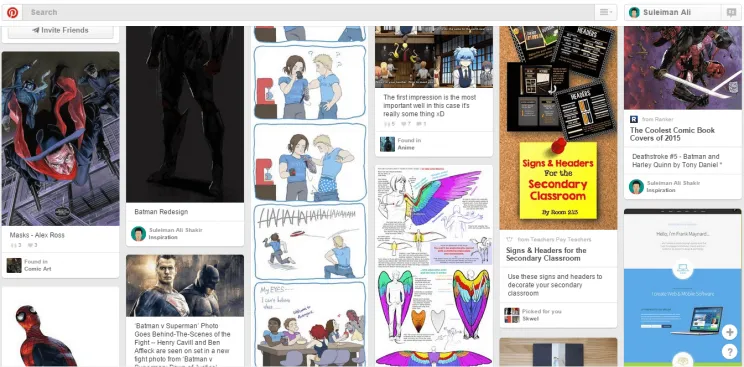
If you have used the Pinterest app or their website, you would have noticed a rather creative grid layout. That is a Masonry Layout.
It works by placing elements in optimal position based on available vertical space, sort of like a mason fitting stones in a wall.
Thankfully, we won’t be needing any external library for this as Android’s native RecyclerView makes implementing a Pinterest masonry layout simply by changing the RecyclerView’s Layout Manager. This is quite popular in web design as well. Let’s look at implementing this in Android.
Start by adding the require Gradle dependencies.
dependencies {
    compile 'com.android.support:appcompat-v7:22.2.1'
    compile 'com.android.support:recyclerview-v7:22.2.1'
}
Masonry Layout - Tile
Now for each tile I will use a simple LinearLayout, however you could alternatively use a Card view.
Nothing fancy up there. Just an ImageView and a TextView for a title. This is the layout for each of our tile. Now this is akin to each list item in your typical ListView. I am purposely skipping our MainActivity’s layout since its just a RecyclerView. We’ll skip that and head onto creating our adapter and hooking it up to our RecyclerView.

Adapter
If you’re familiar with custom ListView in the past, you should be aware of a ViewHolder. This is basically the layout for EACH item in our list.
 class MasonryView extends RecyclerView.ViewHolder {
        ImageView imageView;
        TextView textView;

        public MasonryView(View itemView) {

            imageView = (ImageView) itemView.findViewById(R.id.img);
            textView = (TextView) itemView.findViewById(R.id.img_name);

        }
    }
Now we need to create our RecyclerView’s adapter and tell it to use this ViewHolder of ours.
public class MasonryAdapter extends RecyclerView.Adapter {
    private Context context;

    int[] imgList = {R.drawable.two, R.drawable.one, R.drawable.three, R.drawable.four,
            R.drawable.five, R.drawable.six, R.drawable.seven, R.drawable.eight,
            R.drawable.nine, R.drawable.ten};

    String[] nameList = {"One", "Two", "Three", "Four", "Five", "Six",
            "Seven", "Eight", "Nine", "Ten"};

    public MasonryAdapter(Context context) {
        this.context = context;
    }

    @Override
    public MasonryView onCreateViewHolder(ViewGroup parent, int viewType) {
        View layoutView = LayoutInflater.from(parent.getContext()).inflate(R.layout.grid_item, parent, false);
        MasonryView masonryView = new MasonryView(layoutView);
        return masonryView;
    }

    @Override
    public void onBindViewHolder(MasonryView holder, int position) {
        holder.imageView.setImageResource(imgList[position]);
        holder.textView.setText(nameList[position]);
    }

    @Override
    public int getItemCount() {
        return nameList.length;
    }
}
Nothing much to explain here, except that its our regular RecyclerView adapter. Nothing out of the ordinary, I’m pretty sure everyone’s familiar with this by now. To populate my Staggered Grid, I’m simply using 10 random images loaded from my drawable folder, named one to ten.
Attaching the Adapter
With all that set, all that is needed is to attach this created adapter of ours to our RecyclerView. Note that the key here is the LayoutManager. This helps determine the layout of our RecyclerView. It could be a regular list, a uniform grid, or a staggered grid (which is what we what). This can further be defined to be scrollable either horizontally or vertically.
mRecyclerView.setLayoutManager(new StaggeredGridLayoutManager(2, StaggeredGridLayoutManager.VERTICAL));

        MasonryAdapter adapter = new MasonryAdapter(this);
        mRecyclerView.setAdapter(adapter);
Here, the parameters for the StaggeredGridLayoutManager is the number of columns and orientation respectively. That’s all that’s needed to be done. Nothing fancy or out of the ordinary here. If you’re quite familiar with RecyclerView, you would realize that the only thing that needs to be changed is the LayoutManager that should be used is a StaggeredGridLayoutManager.
Staggered Grid Spacing Fix
Great so its done. Before you run along and test your app, let me stop you right there and ask you to include a tiny fix. The issue is that, while I was building my sample, I noticed that setting a margin on my LinearLayout didn’t seem to work. There was no spacing between my tiles which made the entire list appear joined. This obviously is not what we want. So here’s a quick fix. Create a new class that extends RecyclerView.ItemDecoration that helps add spacing around each tile. You might remember that ItemDecoration helps add things like a list divider for each row item.
public class SpacesItemDecoration extends RecyclerView.ItemDecoration {
    private final int mSpace;

    public SpacesItemDecoration(int space) {
        this.mSpace = space;
    }

    @Override
    public void getItemOffsets(Rect outRect, View view, RecyclerView parent, RecyclerView.State state) {
        outRect.left = mSpace;
        outRect.right = mSpace;
        outRect.bottom = mSpace;

        // Add top margin only for the first item to avoid double space between items
        if (parent.getChildAdapterPosition(view) == 0)
            outRect.top = mSpace;
    }
}
Now just tell our RecyclerView to add this ItemDivider simply:
SpacesItemDecoration decoration = new SpacesItemDecoration(16);
mRecyclerView.addItemDecoration(decoration);
Feel free to add any value you wish for SpacesItemDecoration. That value determines the amount of spacing.
Final Results
I’m not going to stop you from running the app now, so go ahead and run it!

As always, here’s the GitHub link for the source code.
RecyclerView is pretty powerful as you can see. We were able to create a Pinterest masonry layout using a StaggeredGridLayoutManager. It is more flexible that the previous ListView (which I still see a few people using) and strongly suggest you migrate to its better alternative. Its brilliant how just by changing the LayoutManager, we were able the change the face of a regular RecyclerView to come up with something creative.