Add a Toolbar Elevation on pre Lollipop

Being a Material Design lover, I get put off by that default flat Toolbar with no shadow or elevation. It’s alright on Lollipop devices as it gives us a nice shadow by default, but pre Lollipop doesn’t. While that’s too bad, we can take care of that real quick!

After you’re done with this post, your Toolbars on pre Lollipop will never be plain and boring again!

Also read: Create a Card Toolbar (Nested Toolbar).

Faking a Toolbar Elevation

Since we can’t use the actual Toolbar elevation property for pre Lollipop devices, we’ll imitate one by using :

  1.  9-patch PNG
  2. XML gradient

Personally, I find the XML method more clean, so we’ll go with the second one.

Shadow Drawable

Create a new XML file res/drawable/shadow.xml

<shape xmlns:android="http://schemas.android.com/apk/res/android"
    android:shape="rectangle">
    <gradient
        android:startColor="@android:color/transparent"
        android:endColor="#40000000"
        android:angle="90" />
</shape>

Here we set a gradient from top to bottom of an opacity of black to transparent respectively.

shadow.xml

shadow.xml

Creating the Toolbar

Now the trick doesn’t lie in modifying the Toolbar as such, but in simply adding a View below it.

Usually we may define a Toolbar in a separate XML file and call it in via the <include /> tag. We’ll stick to the same format (to avoid large and complex layouts).

Create a layout res/layout/toolbar_shadow.xml and add this:

<LinearLayout xmlns:android="http://schemas.android.com/apk/res/android"
    xmlns:app="http://schemas.android.com/apk/res-auto"
    android:layout_width="match_parent"
    android:layout_height="wrap_content"
    android:orientation="vertical">

    <android.support.v7.widget.Toolbar
        android:layout_width="match_parent"
        android:layout_height="?attr/actionBarSize"
        android:background="?attr/colorPrimary" />

    <View
        android:layout_width="match_parent"
        android:layout_height="4dp"
        android:background="@drawable/shadow" />

</LinearLayout>

Calling it in

Now with that in place, all we need to do is to reference this in our activity’s layout like this:

<include layout="@layout/toolbar_shadow" />

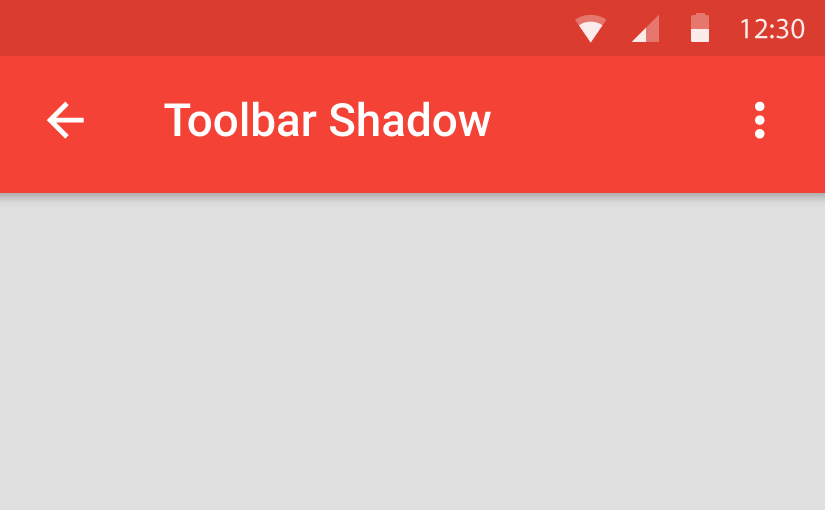
That’s it we’re done! Take a look at the results yourself and see the difference.

on pre Lollipop

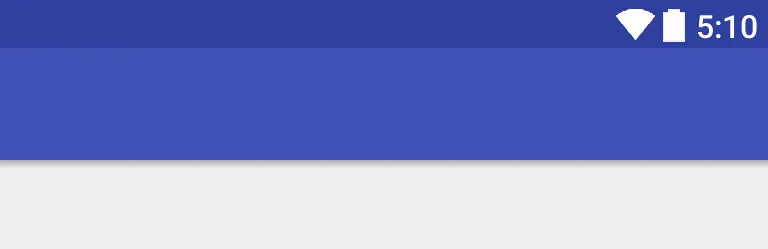
Toolbar Elevation on Lollipop

You can default to the elevation property for Lollipop devices. Now in some cases, as with the new Design support library’s new widgets, after the animation the Toolbars by default have a shadow. So do the Tabs.

You could reference the shadow’s View via an id, and removing it with:

shadowView.setVisibility(View.GONE);

Then set the Toolbar elevation with

toolbar.setElevation(4);

But Wait!

In my opinion, just stick to using the shadow.xml on both pre Lollipop and Lollipop devices. Why? The difference isn’t much and is hardly noticeable.

This is a better trade-off than having to handle it in code, where you must remove the shadow view, then elevate it. That is just a lot of code handling and possible layout inconsistency, you’re much better off this way. One must not waste time as a developer to get something like that to work.


With this way, you can now mimic an elevation for your Toolbars on pre Lollipop as well. We created a shadow drawable in XML using a gradient property. Also you’ve probably accepted the fact that its okay to continue using the same drawable on post Lollipop as well, being a well worth sacrifice.

Do subscribe (below) for instant updates as I continue to bring you more awesome content like this!

Suleiman

Product Designer who occasionally writes code.

You may also like...

12 Responses

  1. Kris says:

    great work!

  2. nodlee says:

    nice ! !

  3. Abhishek says:

    Hey.

    So I tried this out, and came across a little quirk – the content was not going “under” the XML shadow we put in, like it is supposed to when we set elevation. My first instinct was to apply a negative margin to the parent LinearLayout in the toolbar XML, and it worked just as I expected it to.

    • Suleiman19 says:

      I find this to be an elegant solution:

      // Parent frame

      // Actual layout content

      The key lies in placing your include tag at the bottom most in a FrameLayout and then using a marginTop attribute for your actual content. If you’re using RelativeLayout for instance, place the include tag as the top-most child.

      • Clelia says:

        Hi!
        This solution is super clean, I just change it a bit and included the margin in the view with the shadow instead. But I wouldn’t even think about this before this post.
        Thank you and keep up these excellent posts.

      • Suleiman19 says:

        Hey there!
        Glad the post helped you out.

  4. Tshepo Stark says:

    Hello, I was able to do this design but when i try add the support tool bar in my java code, i get casting exceptions because this approach requires the toolbar to be encapsulated within a LinearLayout. How do I work around this?

    • Suleiman19 says:

      Hi Tshepo,
      Great to see you again. I personally implement all this to ensure it works, before posting. I didn’t run into any such issues.
      From the looks of it, you must set the support toolbar by using the TOOLBAR id which resides inside the LinearLayout. You must NOT reference the LinearLayout id as the toolbar itself.

      Hope that helped. Otherwise please post your code somewhere so I can take a look.
      Cheers.

      • Tshepo Stark says:

        Dude! You are like an alien or something, so smart.. Thanks a lot man, worked like a charm! Keep up on the awesome posts, you making android for beginners like me such a breeze

      • Suleiman19 says:

        I’m very much human. I can guarantee you that! 😉
        Good to know that it helps.
        Cheers!

  5. Jeremy Kolb says:

    Can you put an easy to find date on your posts?

Leave a Reply

Your email address will not be published. Required fields are marked *