Android Pagination: Using APIs with Retrofit and Gson
Let’s look at Android Pagination with RecyclerView, using real data from an API. This will give us a better understanding of Pagination. First, we’ll look at what API to use. Next, we will set up a networking library (Retrofit) that will help us perform these API calls.
This is the second post in a series of Android Pagination articles. In the previous, Android Pagination Tutorial: Getting Started article, we learned about Pagination and implemented its logic. We created dummy content to populate our RecyclerView.Adapter.
This article has been updated for AndroidX!
Pagination Series Overview
- Android Pagination Tutorial: Getting Started
- Using APIs with Retrofit and Gson
- Error Handling
- Using Multiple RecyclerView Types
- Adding Swipe-to-Refresh Support
In this post, we will look at fetching data from an API, as a real-time scenario. This will give us a better understanding of Android Pagination. First, we’ll look at what API to use. Next, we will set up a networking library (Retrofit) that will help us perform these API calls.
For a real-world scenario, we’ll need real content from an API. For that, let’s go with themoviedb.org(TMDb). A popular, user-maintained database for movies and TV shows.
The Movie DB API
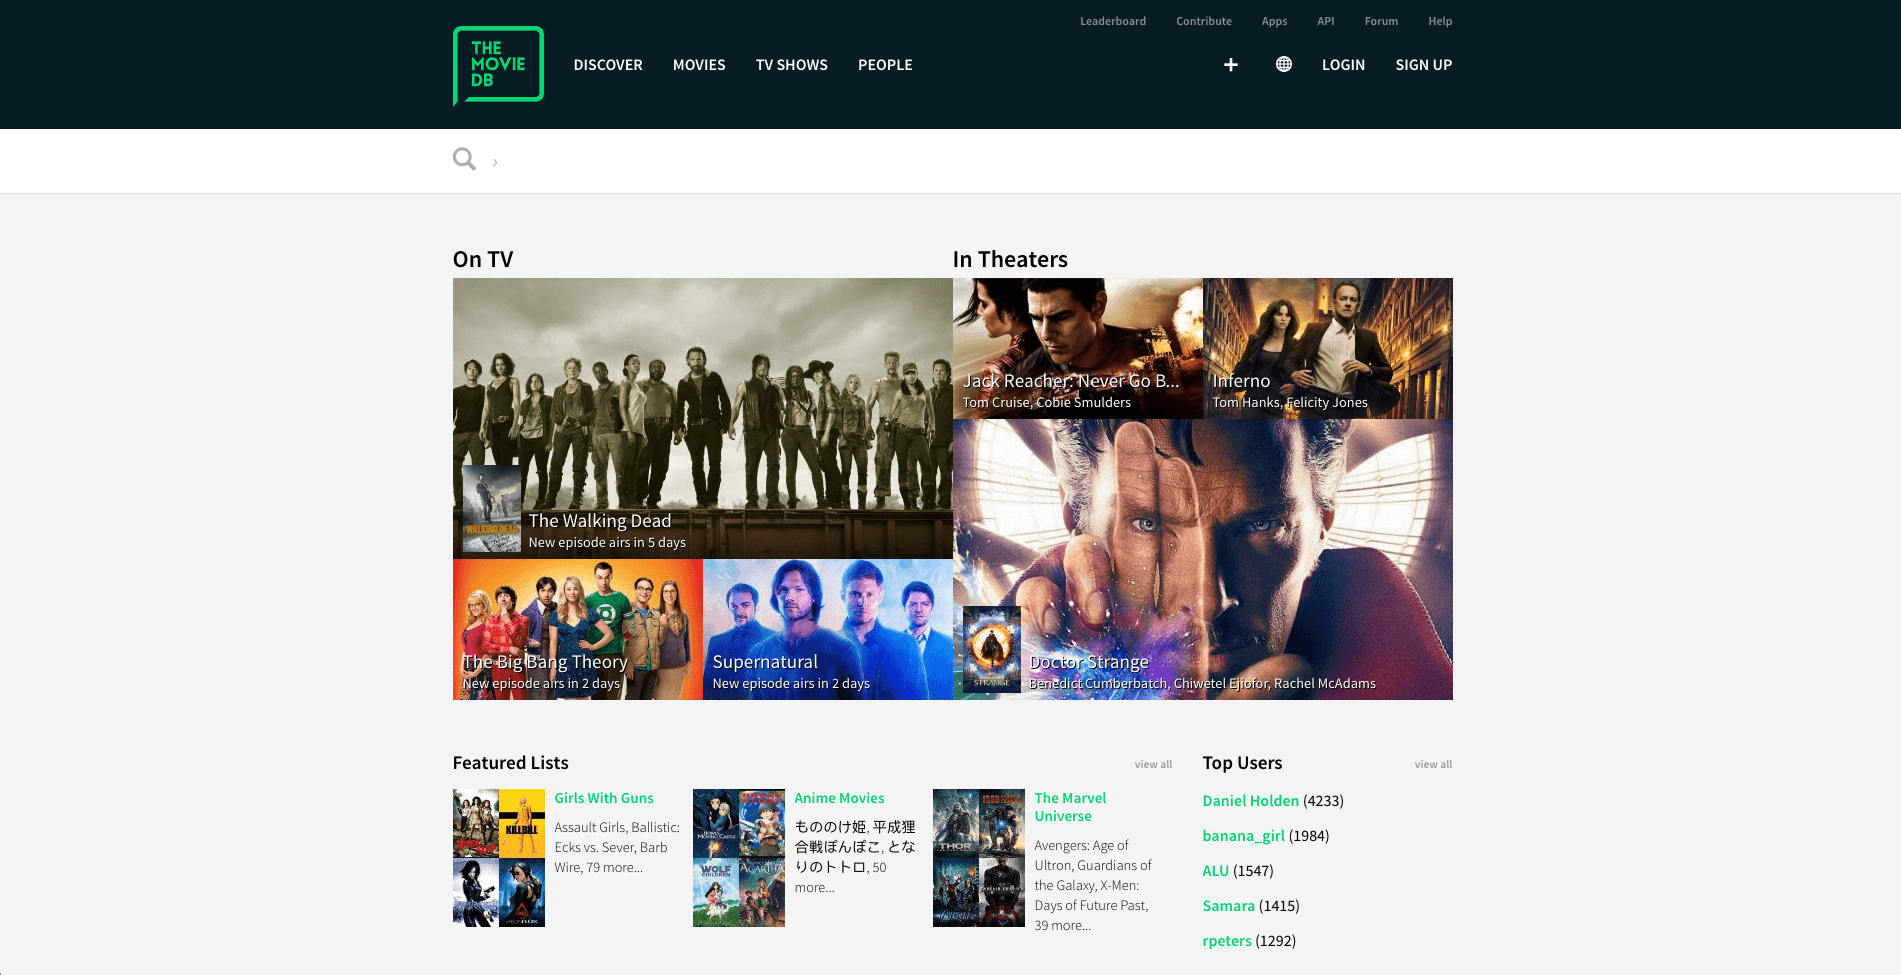
We need an API key before we can start using their APIs. So go ahead and sign up.
Next, login in and go to your account. Generate an API key from there. Be advised, there’s a fairly long form you need to fill. The API is free, so the least we can do is fill a form. So do swift of that, and get your key.
After that, either go through their documentation for in-depth usage. Otherwise, for the scope of this tutorial, we’ll simply make a request to find ‘top rated movies’. You could use a URL of your own choice, or follow along with me.
API Call for Top Rated Movies
Here’s the shortest URL we need:
https://api.themoviedb.org/3/movie/top_rated?api_key=YOUR_API_KEY&language=en-US&page=1
Just remember to replace YOUR_API_KEY with your actual API key!
JSON Response for Top Rated Movies
{
  "page": 1,
  "results": [
    {
      "poster_path": "\/9O7gLzmreU0nGkIB6K3BsJbzvNv.jpg",
      "adult": false,
      "overview": "Framed in the 1940s for the double murder of his wife and her lover, upstanding banker...",
      "release_date": "1994-09-10",
      "genre_ids": [
        18,
        80
      ],
      "id": 278,
      "original_title": "The Shawshank Redemption",
      "original_language": "en",
      "title": "The Shawshank Redemption",
      "backdrop_path": "\/xBKGJQsAIeweesB79KC89FpBrVr.jpg",
      "popularity": 8.522754,
      "vote_count": 5493,
      "video": false,
      "vote_average": 8.34
    },
  … // Other result (movie) objects
  ],
  "total_results": 4341,
  "total_pages": 218
}
Notice the page attribute in the response. It starts at 1. We also get a nice response that tells us the total_pages is 218. That means we can Pagination 218 times in total, with about 20 content per page! However, we don’t need that much, so for this tutorial, let’s stick to 5 pages in total?
TIP:
I recommend using Postman when dealing with APIs. It gives you a clear idea of how to construct proper API requests. Also, the formatted JSON response is handy too.
Before we begin, we’ll need to decide upon a networking library (and image loading library too, if you wish). Dealing with text and media in APIs is pretty common, so I’ll assume we need both. These libraries will do most of the heavy-lifting, allowing us to focus on the app itself.
Tech Stack:
- Gson – library to convert Java Objects into their JSON representation and back
- Retrofit – HTTP client for Android
- Glide – image loading and caching library for Android; handy for smooth scrolling
You might be familiar with Retrofit and Gson. They’re a powerful combination, often preferred when dealing with APIs. The CodePath guides is a perfect place to start for the uninitiated:
However, not to worry if you’re unfamiliar with them. I’ll be going over the basics. Just enough to get your app working!
Also Read: Create an Image Gallery Android App with Sugar ORM and Glide.
Getting Started
Start by adding Gson, Retrofit, and Glide to your app/build.gradle.
ext {
    retrofit = '2.6.1'
    axAppcompat = '1.0.2'
    axOthers = '1.0.0'
    glide = '4.9.0'
    supportLib= '28.0.0'
}

  /*
        TODO: remove temporary fix for Glide compiler issue
        https://github.com/bumptech/glide/issues/3185
      */

    // Temporary fix begin
    implementation "com.android.support:support-annotations:${supportLib}"
    annotationProcessor "com.android.support:support-annotations:${supportLib}"
    // Temporary fix end

    implementation "com.squareup.retrofit2:retrofit:${retrofit}"
    implementation "com.squareup.retrofit2:converter-gson:${retrofit}"
    implementation ("com.github.bumptech.glide:glide:$glide") {
        exclude group: "com.android.support"
    }
    annotationProcessor "com.github.bumptech.glide:compiler:$glide"
NOTE
You might notice that I’ve added Android’s Support libraries while I’m also using AndroidX. This is a temporary workaround that’s needed because currently, Glide’s annotation processor has only partial support for AndroidX. In other words, this won’t break anything since I’ve tested it for you. Simply copy paste these dependencies and you should be good.
Additionally, we need a Gson converter for Retrofit. It allows serializing JSON responses to model classes using Gson, automagically! This allows us to work with data, via models. So, no more manual JSON parsing!
Don’t forget to add internet permissions in AndroidManifest.xml!
<uses-permission android:name="android.permission.INTERNET"/>
Note:
This is not a tutorial about using Retrofit. However, I will go through the bare minimum that’s required to set up Retrofit and use it.
Preparing Model Classes with Gson
We need to create model classes that mirror our API response. While you can take your time to manually create this, I want to automate it. We already know how our API response looks like. So let’s auto-generate our model classes and save ourselves time.
Head over to http://www.jsonschema2pojo.org and paste your API response. Set the parameters on the right as follows:
- Set the (project) package name and parent model class name (ideally should be the name of the API call, i.e. TopRatedMovies)
- Set Source Type as JSON
- Set Annotation Style as GSON
Finally, hit Zip to generate the class files and download them. Or, you can get the files directly from me. 🙂
Let’s take a quick breather here. Did you just see what we did? We auto-generated all the model classes we need to handle a particular API response. Just how amazing is that!?
Either way, you’ll end up with two model classes. Parent model TopRatedMovies and the other model is automatically named Result. Notice how each model’s property is annotated to its JSON response attribute. Gson uses these annotations to map the JSON values to its respective model properties.
With this done, we can proceed to set up Retrofit.
Modifying PaginationAdapter
Compare the API response with our model classes. Each movie object in the array is Result.java, and the entire response is TopRaterMovies.java.
Also, consecutive page requests indicate multiple TopRatedMovies model. This implies that our RecyclerView.Adapter must use List<TopRatedMovies>. So go ahead and modify PaginationAdapter to use the same.
Updated PaginationAdapter can be found here.
Note:
Delete the Movie.java model class as its no longer needed.
Configuring Retrofit
Create a class MovieApi.java. This will be responsible for configuring the Retrofit client. Next, create an interface called MovieService. We will define all our API calls here. Retrofit uses Annotations to define API calls.
Open MovieApi.java. We’ll now configure the Retrofit client.
public class MovieApi {
 private static Retrofit retrofit = null;

 public static Retrofit getClient(Context context) {
  if (retrofit == null) {
   retrofit = new Retrofit.Builder()
    .addConverterFactory(GsonConverterFactory.create())
    .baseUrl("https://api.themoviedb.org/3/")
    .build();
  }
  return retrofit;
 }
}
Note:
Remember that the base URL must always end with a forward trailing slash.
Now, head over to MovieService.java. We will define our top-rated movies API call here.
// Declare all your API calls here
public interface MovieService {

 @GET("top_rated")
 Call < TopRatedMovies > getTopRatedMovies(
  @Query("api_key") String apiKey,
  @Query("language") String language,
  @Query("page") int pageIndex
 );
}
Making API Calls with Retrofit
Go to MainActivity. If you remember from Part 1 of the Android Pagination tutorial, there is a method called loadFirstPage(). We were loading dummy data here at first. Scrap those lines off. Now we’re going to perform the API request here. We’ll start by requesting for the very first page, i.e. page 1.
...
@Override
protected void onCreate(Bundle savedInstanceState) {
 …
 //init service and load data
 MovieService movieService = MovieApi.getClient().create(MovieService.class); //1
 loadFirstPage();
}
/**
 * Performs a Retrofit call to the top rated movies API.
 */
private Call < TopRatedMovies > callTopRatedMoviesApi() { //2
 return movieService.getTopRatedMovies(
  getString(R.string.my_api_key),
  "en_US",
  currentPage
 );
}
/*
 * Extracts List<Result> from response
 */
private List < Result > fetchResults(Response < TopRatedMovies > response) { //3
 TopRatedMovies topRatedMovies = response.body();
 return topRatedMovies.getResults();
}
private void loadFirstPage() {
 callTopRatedMoviesApi().enqueue(new Callback < TopRatedMovies > () { //4
  @Override
  public void onResponse(Call < TopRatedMovies > call, Response < TopRatedMovies > response) {

   List < Result > results = fetchResults(response); //5
   progressBar.setVisibility(View.GONE);
   adapter.addAll(results);


   if (currentPage <= TOTAL_PAGES) adapter.addLoadingFooter();
   else isLastPage = true;
  }

  @Override
  public void onFailure(Call < TopRatedMovies > call, Throwable t) {
   // handle error
  }
 });
}
private void loadNextPage() {
  callTopRatedMoviesApi().enqueue(new Callback < TopRatedMovies > () { //6
   @Override
   public void onResponse(Call < TopRatedMovies > call, Response < TopRatedMovies > response) {
    adapter.removeLoadingFooter();
    isLoading = false;

    List < Result > results = fetchResults(response);
    adapter.addAll(results);

    if (currentPage != TOTAL_PAGES) adapter.addLoadingFooter();
    else isLastPage = true;
   }

   @Override
   public void onFailure(Call < TopRatedMovies > call, Throwable t) {
    // handle failure
   }
  });
 }
 ...
Here are crucial snippets of an updated MainActivity.java. Let’s go over what each of the commented steps means.
- Start by initializing MovieService object with a Retrofit instance. Look at
getClient()method in MovieApi.java, you’ll notice that it builds a configured Retrofit instance. callTopRatedMoviesApi()returns the Retrofit API call since we’ll be reusing the same. The method parameters passed here are query parameters for the API’s URL.- Another helper method that extracts the list of results (movies) from the API response.
- Attach an API callback using
enqueue()to handle the response. - Notice how the callback returns
Response<TopRatedMovies>and not a generic JSON String. This is the magic of Gson. It serialized the entire response into TopRatedMovies. However, what we actually need is a list of movies gives byList<Results>from TopRatedMovies class. - We use the same API call for loading the next page too.
mCurrentPageis incremented by PaginationScrollListener, so the API loads the indicated page number
If you noticed back in the API response, Pagination starts from page 1. There is no index zero. Hence change PAGE_START = 1. Additionally, the response includes other useful information such as up to how many pages we can paginate.
Updating PaginationAdapter to display API data
Now, we have a working API call with a response, so head over to PaginationAdapter. First, we start by updating our helper methods. If you can recall, we had defined the following methods in Part 1:
void add(Result r)
void addAll(List<Result> moveResults)
void remove(Result r)
void clear()
boolean isEmpty()
void addLoadingFooter()
void removeLoadingFooter()
Result getItem(int position)
NOTE
We don’t use the Movie model class anymore. Instead our ‘Movie’ object is now replaced by Result.java. So update your methods accordingly!
Next, our list of data will now become a List<Result> object. So change that in your adapter as well, if you haven’t.
With that done, the last step is to update onBindViewHolder() with our new data.
@Override
public void onBindViewHolder(RecyclerView.ViewHolder holder, int position) {

 Result result = movieResults.get(position); // Movie

 switch (getItemViewType(position)) {
  case ITEM:
   final MovieVH movieVH = (MovieVH) holder;

   movieVH.mMovieTitle.setText(result.getTitle());

   movieVH.mYear.setText(
    result.getReleaseDate().substring(0, 4) // we want the year alone
    +
    " | " +
    result.getOriginalLanguage().toUpperCase()
   );

   movieVH.mMovieDesc.setText(result.getOverview());

   // Using Glide to handle image loading.
   Glide
    .with(context)
    .load(BASE_URL_IMG + result.getPosterPath())
    .listener(new RequestListener < String, GlideDrawable > () {
     @Override
     public boolean onException(Exception e, String model, Target < GlideDrawable > target, boolean isFirstResource) {
      // handle failure
      movieVH.mProgress.setVisibility(View.GONE);
      return false;
     }

     @Override
     public boolean onResourceReady(GlideDrawable resource, String model, Target < GlideDrawable > target, boolean isFromMemoryCache, boolean isFirstResource) {
      // image ready, hide progress now
      movieVH.mProgress.setVisibility(View.GONE);
      return false; // return false if you want Glide to handle everything else.
     }
    })
    .diskCacheStrategy(DiskCacheStrategy.ALL) // cache both original & resized image
    .centerCrop()
    .crossFade()
    .into(movieVH.mPosterImg);

   break;

  case LOADING:
   //                Do nothing
   break;
 }
}
TIP
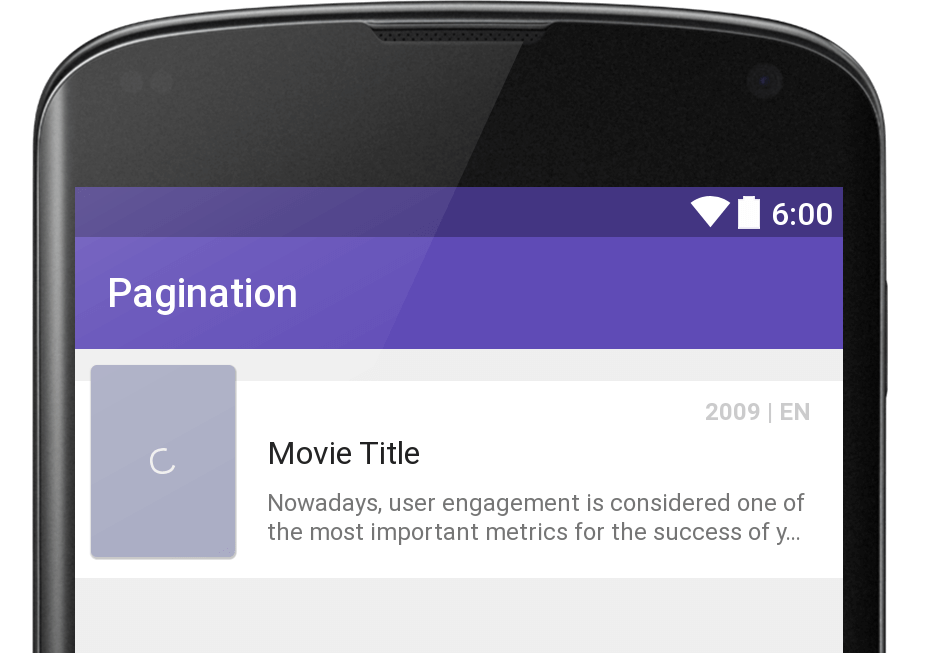
Don’t forget to update your ViewHolder item layout accordingly. For example, here’s how I’ve modified mine to display the new data. However I’m sure you can come up with something better!
BONUS – Automatically Log Network Calls
With Retrofit, it might be a little difficult to manually log network responses. Since Gson maps it to our model classes, getting back the JSON is difficult. As trying to deserialize an already serialized response, defeats the purpose of using Gson in the first place. So what can we do?
Retrofit plays nicely with OkHttp, an efficient HTTP client for Android and Java. By using Interceptors, OkHttp allows us to ‘intervene’ between network calls and perform our desired action.
Interceptors are a powerful mechanism that can monitor, rewrite, and retry calls – OkHttp Wiki
A popular use case for Intercepters would be to append our API key as a query parameter to every request. This sure beats manually passing it as a method parameter to each request.
Coming back to automatic logging, we will be using the very same Interceptor to get our job done.
Add the following library to your app/build.gradle:
implementation 'com.squareup.okhttp3:logging-interceptor:4.0.1'Next, open MovieApi.java and modify the getClient() method as follows:
// builds OkHttpClient with logging Interceptor
 private static OkHttpClient buildClient() {
  return new OkHttpClient
   .Builder()
   .addInterceptor(new HttpLoggingInterceptor().setLevel(HttpLoggingInterceptor.Level.BODY))
   .build();
 }
 public static Retrofit getClient() {
  if (retrofit == null) {
   retrofit = new Retrofit.Builder()
    .client(buildClient())
    .addConverterFactory(GsonConverterFactory.create())
    .baseUrl("https://api.themoviedb.org/3/")
    .build();
  }
  return retrofit;
 }
The highlighted line emphasizes how the custom client is attached to the Retrofit builder. You can use the buildClient() method to add yet another Interceptor if you wish.
Run your app now and you’ll observe that your network activity is now automatically logged. You can even find the raw JSON response there. Cheers!
The complete project with auto logging is available in commit “auto logging network calls“.You can see the source code that contains auto-logging network calls.
Output
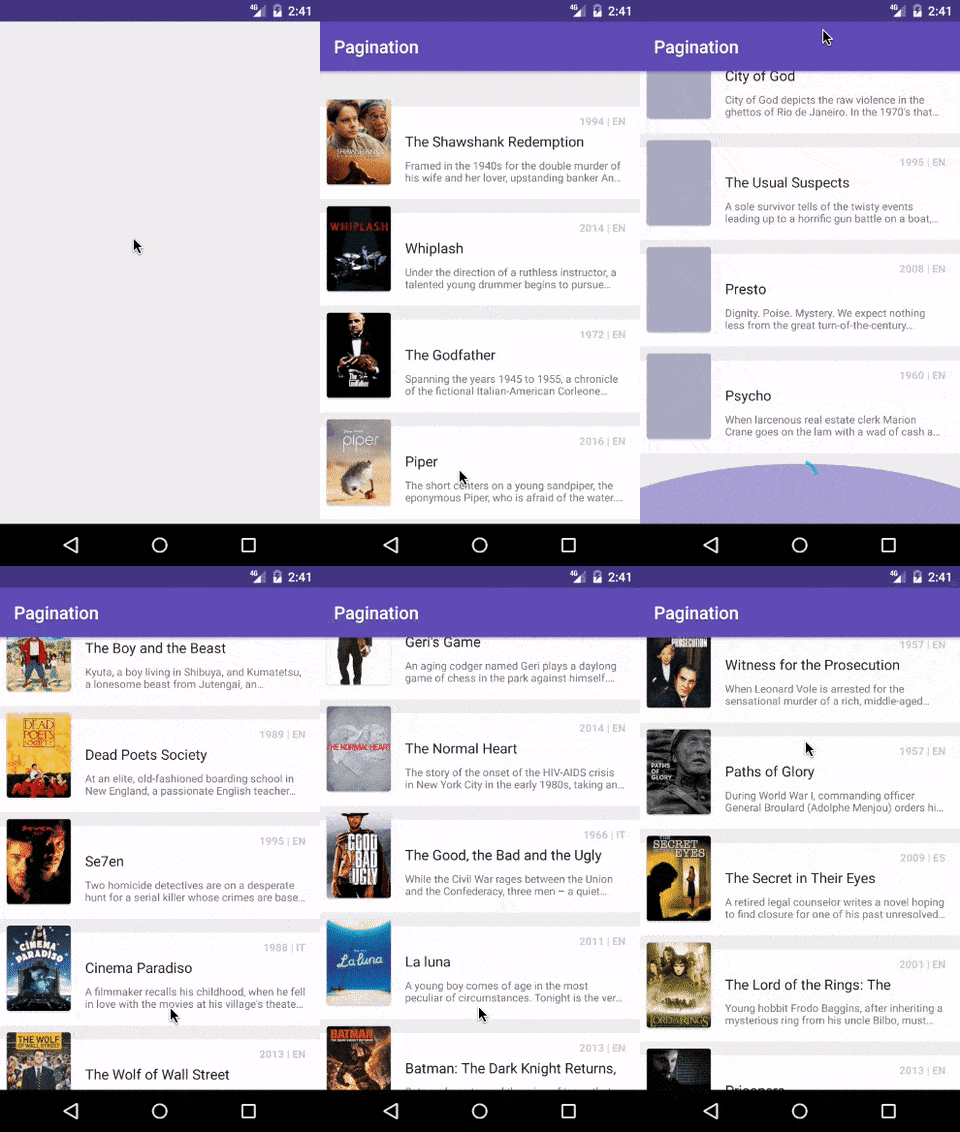
Now that we’ve done everything needed, go ahead and run your app. Here’s how the output should look like:
Note:
You might notice duplicated contents at the end and the beginning of consecutive pages. Eg: The movie ‘Empire Strikes Back’, might appear twice. This occurs twice in the paginated response and is no cause for alarm.
Project Available on GitHub
View the entire project source code.
In this post, we were able to take Pagination and apply it to a real-world example using an API. We used Retrofit to handle our networking, Gson to maintain our model classes and auto-parse JSON results. We also used Glide to make image handling a breeze. Next, we updated our existing code to reflect the new API.
However, with network and API calls in play, we cannot ignore the scenario of an API call failing. Nor can we ignore when our mobile data or Wi-Fi stops working. Error handling becomes imperative in such cases.
In Part 3, I’ll show you how to deal with such cases.



Thank you very much for the content.
but, the picture about the movie cannot be loaded because of an API error.
Hello, there will be an error if I build the data as if it’s old.
So I modified the code.
Please refer to the link below.
Thank you.
https://github.com/h12sw06/android_kotlin_recyclerview_pagination
can see the json ?
I have included a sample response at the beginning of the tutorial.
What about for data fetched from mysql database with retrofit?.
You can use Room to handle data in SQL. Nothing changes in the Pagination logic. Only your data source will change 🙂